1. Start to Downs Link
Leave Shoreham-by-Sea Station onto Buckingham Road. With your back to the station and the level crossing to your left, cross over Buckingham Road with care and take the side road ahead, Queen’s Place. Follow this road all the way to the end at a crossroads.
Go straight ahead, signed with a blue cycle sign for the Downs Link. At the next crossroads, go ahead once again to join Swiss Gardens, passing a school on your right. Further along, Swiss Gardens becomes Connaught Avenue. Simply keep ahead along this avenue, which eventually swings right and leads you to a T-junction. Turn left to reach the mini roundabout with The Amsterdam Inn pub on the left. Cross over the road with care and go through the small wooden gate to reach the estuary side footpath and cycleway known as the Downs Link.
2. Downs Link to South Downs Way
Turn right along the Downs Link, heading inland with the River Adur running on the left. Do NOT cross the bridge, instead keep straight ahead on the Downs Link, a wide stone track with the River Adur running across to the left. The Downs Link leads you past a wooden heron sculpture and then under the A27.
Follow the Downs Link path for about 2 miles and eventually you will come to a path T-junction with the River Adur ahead, marked with a fingerpost. Turn right, staying with the Downs Link track. The track follows the line of the Adur swinging steadily left and, further along, swings right to reach a crossroads with the South Downs Way, with a river footbridge on your left.
3. South Downs Way to Mill Hill
Do NOT cross the river, instead turn right (signed to Devil’s Dyke) and follow this path out to a lay-by alongside the A283. Walk straight ahead, over the near grass verge and then cross the A283, taking time to watch and listen for traffic as it can be busy. At the far side, turn left along the pavement, pass the bus stop, and then turn right alongside a metal gate (signed as the South Downs Way).
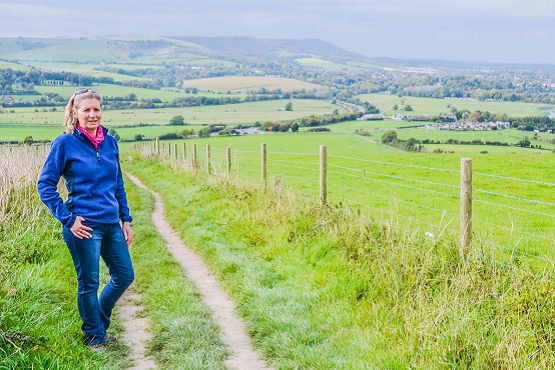
Follow this grass and stone track leading you steadily uphill between fenced pastures. As you reach the gate at the top of the first stretch, it is the perfect spot to pause, catch your breath and admire the views across the Adur Valley that have opened up behind you.
Pass through the gate (NOTE: this pasture is likely to be holding cattle) and follow the obvious track directly ahead across the field. At the end, pass through the bridle gate to reach a T-junction with a stone track. Turn right for just a few paces and then turn right again to join the small tarmac lane, Mill Hill, signed as a public byway
4. Mill Hill to Nature Reserve
Follow this quiet tarmac lane, taking care of any occasional traffic, with the pasture that you just crossed running immediately on your right. You will pass the end of Anchor Bottom and then simply stay with the lane which leads you up and over the brow of the hill.
Continue downhill for half a mile at which point you will find a fingerpost on the right (about 200 metres before the lane enters a tunnel of trees). Turn right through the small gate to join the signed public footpath. Follow the stone track, staying close to the left-hand field boundary. Just before the bottom field corner, follow the track as it swings left into the adjacent field.
Keep straight ahead on the obvious track with a crop field on your right and a hedgerow running on your left. Beyond the crop field, stay with the stone track as it leads you between fenced pastures to reach Erringham Farm. Pass the farm buildings on your left and then cross the stile ahead to enter a horse paddock. Cross the paddock at 11 o’clock and cross the next stile to enter a sheep pasture. Follow the obvious grass track ahead, with a bank of scrub on the left. At the end of the pasture, a couple of gates lead you into Mill Hill Nature Reserve.
5. Nature Reserve To End
NOTE: Cattle are used at some points during the year to provide conservation grazing so take particular care with dogs. Immediately after passing through the wooden gate into the reserve, turn right (signed as the public footpath). Follow this narrow path which hugs the contour line of the hillside. At the far end, follow the path up the wooden steps and you will emerge to a T-junction with a higher grass path.
Turn right and stay on the main grass path which leads you to the nature reserve’s parking area. Leave the reserve through the gate and turn right along the road, Mill Hill, taking care of traffic for the first short stretch which is fairly narrow. Join the pavement as the road leads you over the A27. Beyond the bridge, ignore the footpath signed off to the right, simply keep ahead on Mill Hill, descending steadily between houses.
At the end you will come to a T-junction. Cross over and turn left along the pavement, following the road as it swings right. At the end of the road, you will come to a crossroads. Use the zebra crossing to cross over and go straight ahead into Mill Lane. Towards the bottom of the road, you will pass Mill Lane cemetery on the right and, just as the road swings right, turn left into the side road which is a continuation of Mill Lane.
At the end of Mill Lane you will come to a T-junction with Buckingham Road. Turn right for just 200 metres and you will reach Shoreham-by-Sea rail station where the walk began.